A multi-step campaign is an easy and effective way to send a series of campaign emails to send to your subscribers.
Typically, most promotions in your business will involve multiple touch-points or be run over a series of time. For example, you may run a Valentines Day promotion for 14 days or a Summer Collection Launch for 30 days.
With Instant AI Multi-step Campaigns, you can schedule all of your campaign emails into one sequence. This helps you:
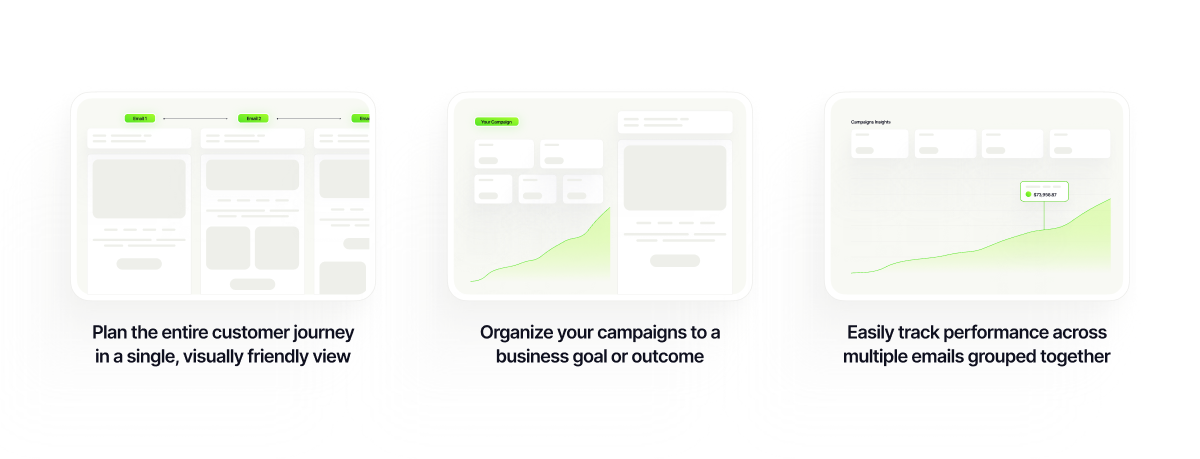
Multi-step campaigns can be created manually from scratch, or you can use AI to help build your first draft and make any further edits that you need.
How to create and draft a multi-step campaign
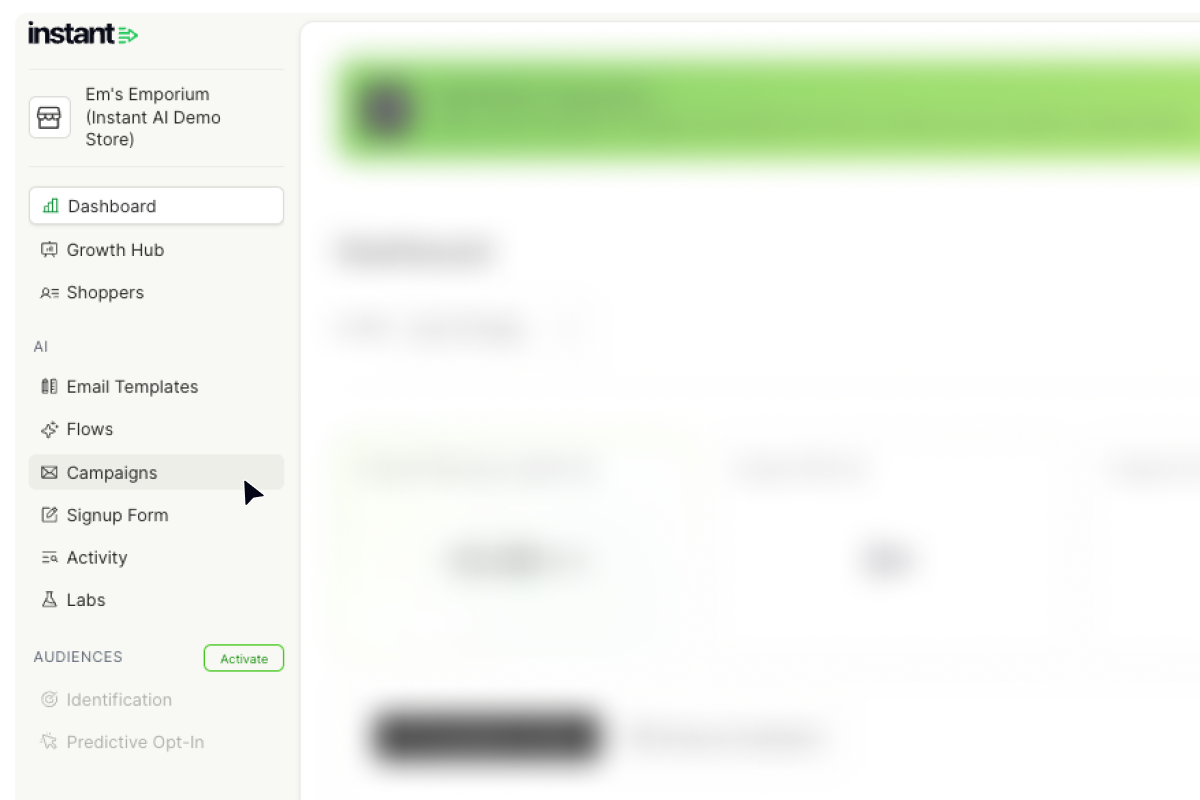
- In your Instant Dashboard, select ‘Campaigns’ from the side menu.
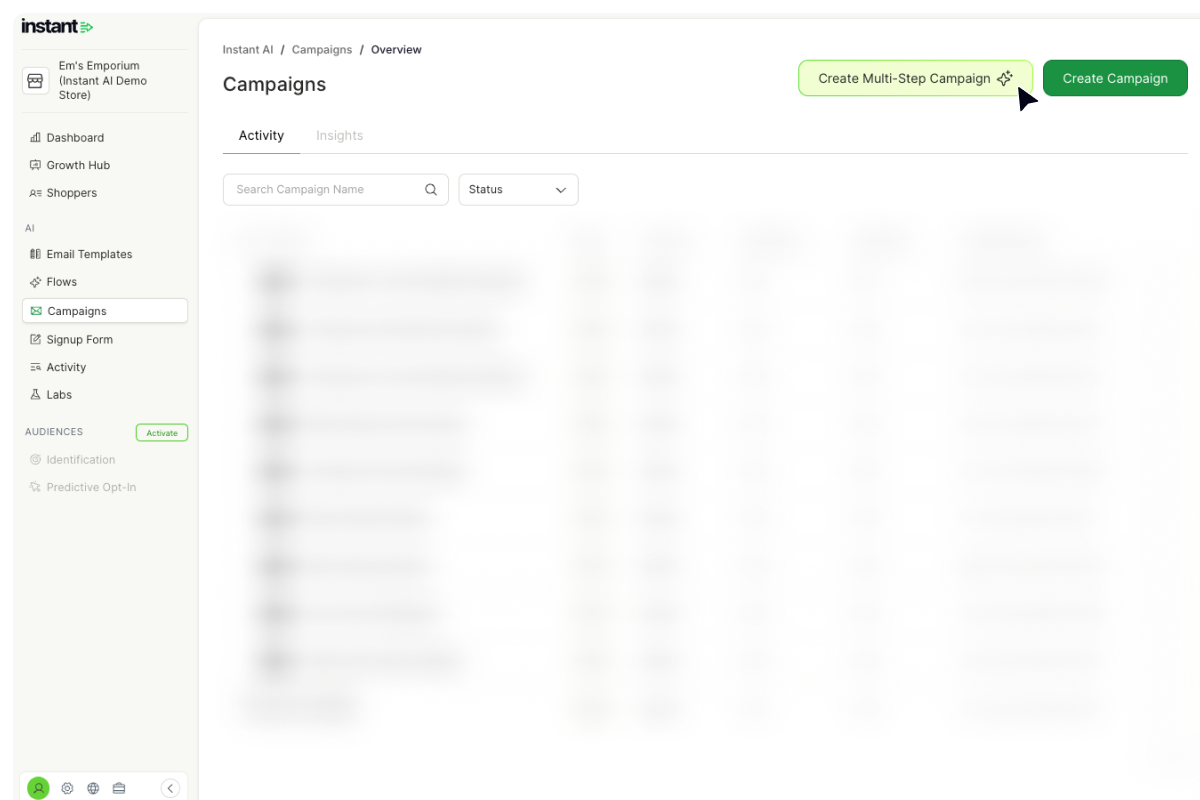
- Select Create Multi-Step Campaigns
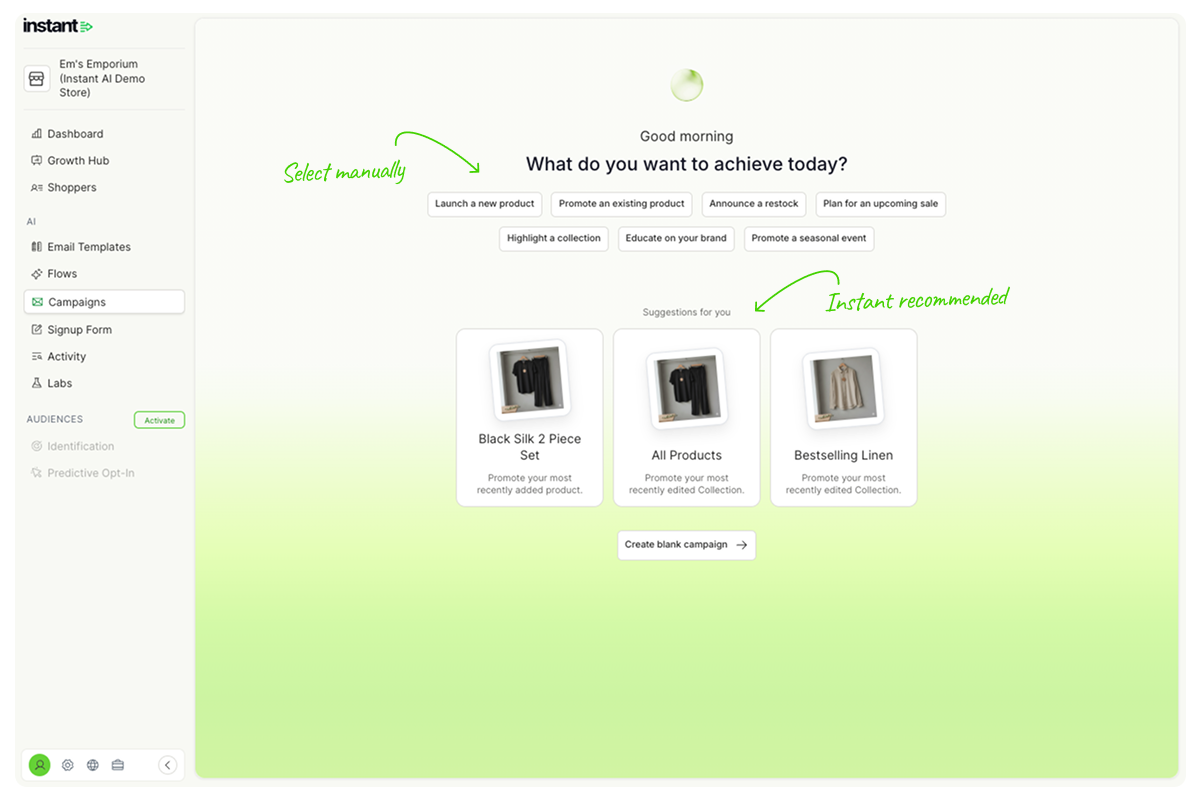
- You'll see two ways to begin:
- Use a suggested campaign - Instant recommends one based on your activity in your shopify store
- Pick a goal manually - choose from the list at the top of the page
-
Pick what to promote
- If you chose a suggested campaign, skip ahead to step 6, your product is already selected.
- If you picked a goal manually, you can choose what to feature. You have three options from here:
- Suggested product: based on activity in your Shopify store
- Product search: search for a specific product to feature
- Collection search search for a whole collection to feature
- Choose how many emails to draft.
Pick the number of emails you want AI to draft for your campaign. Four is a good starting point for a two-week promo.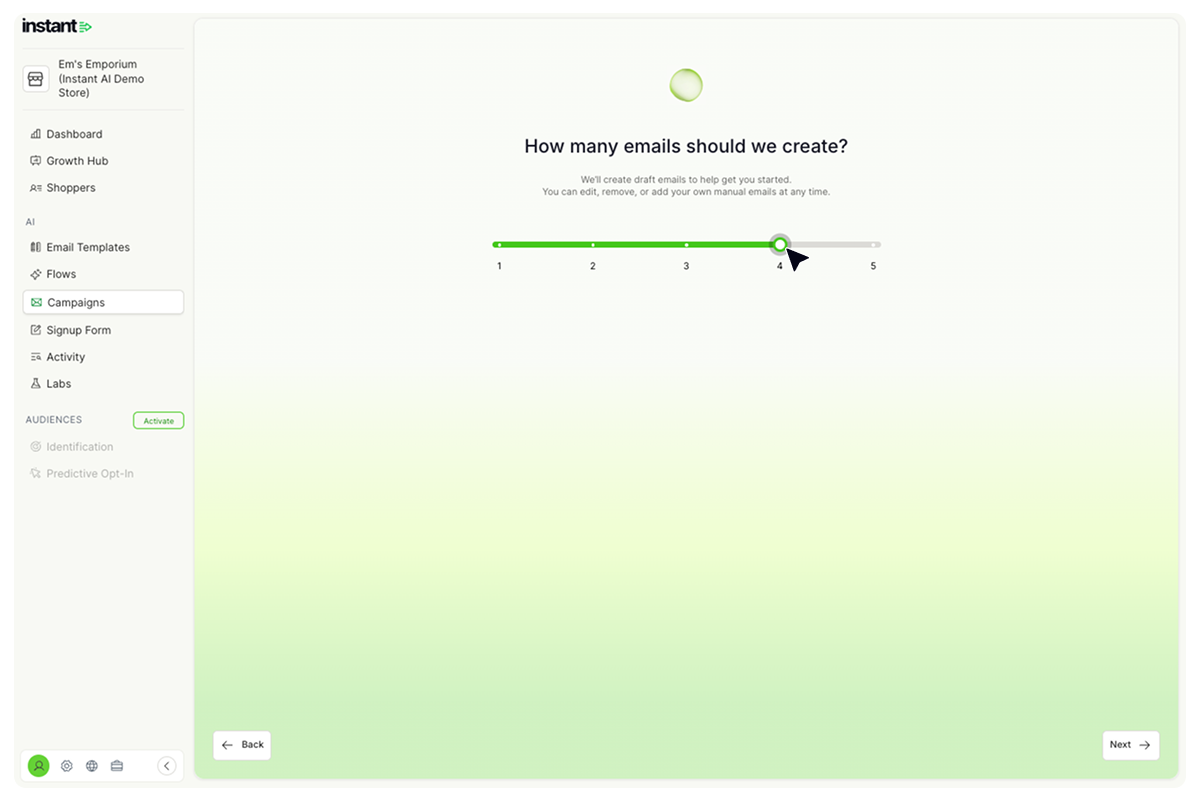
- Select ‘Next’ and sit tight. Your campaign draft will be ready in seconds.
- Finally, click ‘See your campaign’.
How to create a manual multi-step campaign
- In your Instant Dashboard, select ‘Campaigns’ from the side menu.
- Select Create Multi-Step Campaigns
- Select Create Campaign
Next, you'll be immediately taken to the email editor to build your campaign.
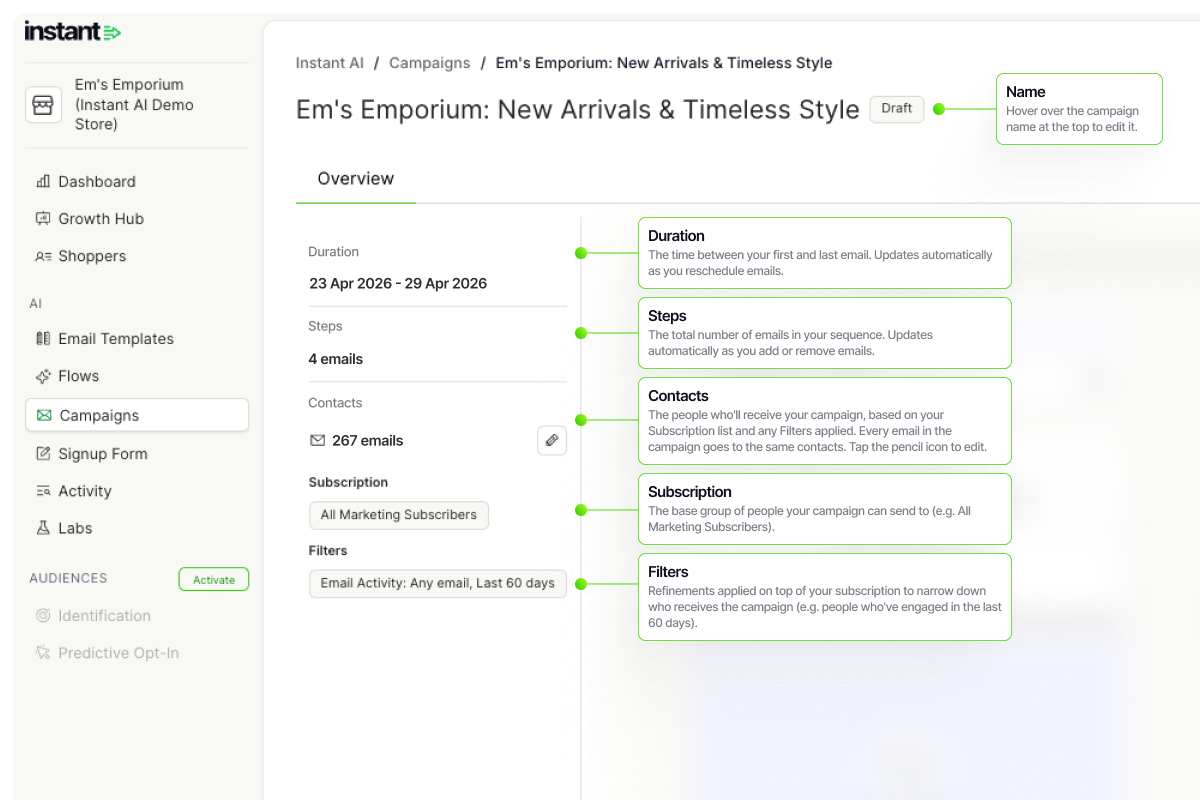
How to edit your multi-step campaign
Before we start, let's understand all of the properties if your Multistep campaign:
Editing an email in your sequence
- Find the email you want to edit and select Edit
- Update the design in the editor, then edit the subject line and preview text
- Select Save
- Check the send date and time are correct
Adding an email in your sequence
- Scroll to the end of your sequence and select Add Email
- Design your email and add a subject line and preview text
- Select Save
- Check the send date and time are correct
Tip: To reuse an existing email, hover over it in the sequence and select Clone.
Emails must be scheduled at least 15 minutes in the future and will send in your store's default timezone. New emails default to 2 days after the previous email, but you can change this to any date after the previous email.
Deleting a step in your sequence
- Hover over the email you want to delete and select Delete
- Select Save in the top right
This only deletes the email you selected, not the whole campaign.
Reordering emails
- Hover over any email in the sequence
- Select the left or right arrows to move it
- Select Save in the top right
Reordering moves the email content only, send dates and times stay linked to their original step. For example, if you swap steps 1 and 2, the emails move but the send times don't.
Editing a sending segment
Every multistep campaign starts with a default segment. To change who receives it:
- Select the underlined number of contacts to open the filters
- Apply your filters and confirm the estimated contact count
- Select Done, then Save in the top right
Sending a preview
Select Send Preview in the editor. You'll receive a preview of every email in the campaign at your email address, with subject lines labelled [1/1 Campaign], [2/3 Campaign], etc., so you can follow the sequence.
Some inbox providers may not deliver preview emails in order if several arrive at once. Use the subject line labels to check the sequence. These labels only appear on previews, customers won't see them.
How to schedule your Multistep Campaign
- Select Review and Schedule. A modal will show your full campaign configuration
- Check everything is correct:
- Dates are right
- Contacts and filters look good
- Emails preview correctly (select any step to see them)
- No placeholder images left in your emails
- Select Schedule
Your campaign is now scheduled and ready to send.
How to edit a scheduled campaign
If you need to change a campaign that's already scheduled or in progress:
- Select Edit Campaign, then Pause and Edit
- Make your changes and save
The campaign stays paused while you edit, so all your changes can be validated before resuming.
A few things to know:
- Your changes take effect once you save and resume the campaign
- Cancelling or discarding will revert any changes
- You can edit a campaign as long as at least one email is still scheduled to send
- Contacts and segments can't be changed once the campaign has started sending